Vendor Commitments: Display PDF and Image Attachments as a Separate Page
You now have the ability to embed a PDF or image file as a separate page of a Vendor Commitment. Rather than attaching the file as a link or url under the “Additional Attachments” page of the Vendor Commitment, it can be displayed as its own page if you select the option to do so.

Who is impacted by this update?
Anyone who creates and issues Vendor Commitments such as Subcontract Agreements and Purchase Orders. Typically, Project Managers, Project Coordinators, and Admins.
Why would you use it?
For important documents you typically attach along with your Commitments such as Subcontracts, you may want these to display as a page incorporated into the Commitment. This eliminates the need for the Vendor or recipient to click a link to open and download the attachment.
How to use this feature
When you create a Vendor Commitment in the Buyout tab, you will see the option to “Display as a Separate Page” in the Attachments step (step 6). Check this box if you want the file to be displayed as a separate page in the Commitment. Otherwise, it will be included as a link in the “Additional Attachments” page. Only PDF and image files may be embedded as separate pages.
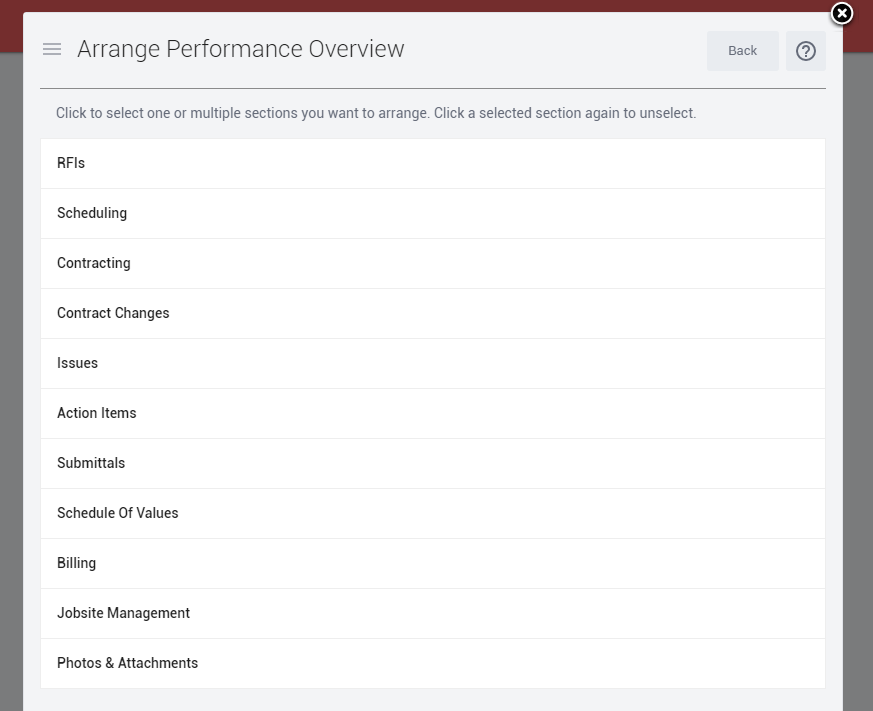
Performance Overview: Arrange Sections
We recently released the ability to “Save Selections” when generating a Performance Overview. That feature allows you to save your preferences by user for the sections to be included in the report. Now, users may also arrange those sections and your preference will be saved if you click “Save Selections” on the form.
Who is impacted by this update?
Anyone who generates a Performance Overview, often to be sent to the customer or owner of the Project for status updates.
Why would you use it?
The arrange feature is useful if you have a client who is particular about the order of the information they want to see in the status report for the Project. For instance, you may want to include RFIs first.
How to use this feature
In the Projects menu, go to the home menu and click “Performance Overview” under Reports. You will see the option to Arrange in the top right corner. Arrange the sections and then click back to update the form. Once Arranged, you may also choose to include or exclude certain sections . Click “Save Selection” to save the arrangement and selections for the next time you generate the Performance Overview.
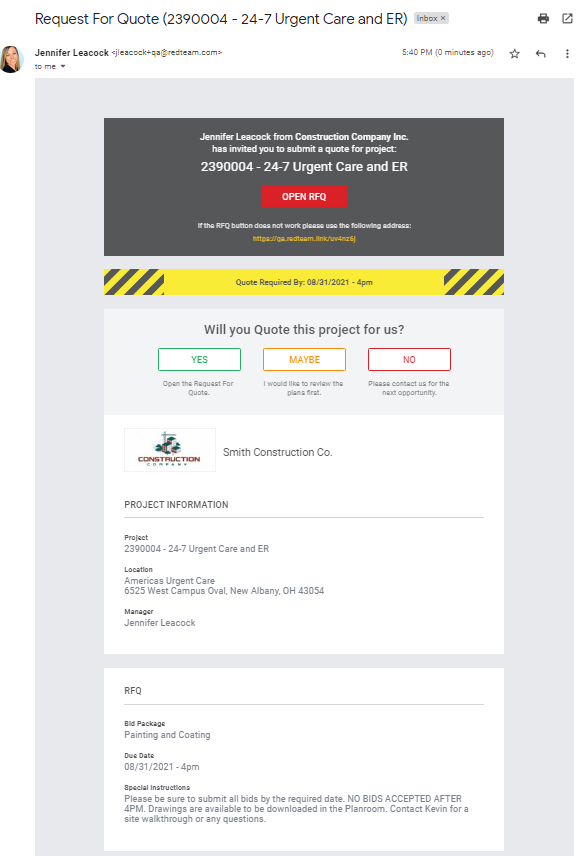
Request for Quote (RFQ) Email Notification: Display Special Instructions
When emailing a Request for Quote (RFQ) the email notification the Vendor receives will include the Special Instructions entered when the RFQ was created without the Vendor having to open the RFQ.
Who is impacted by this update?
Anyone who sends RFQs to potential bidders (Vendors). Typically Estimators and the Precon team.
Why would you use it?
To indicate important Project information to potential bidders.
How to use this feature
When adding or editing a RFQ, enter info in the Special Instructions field.
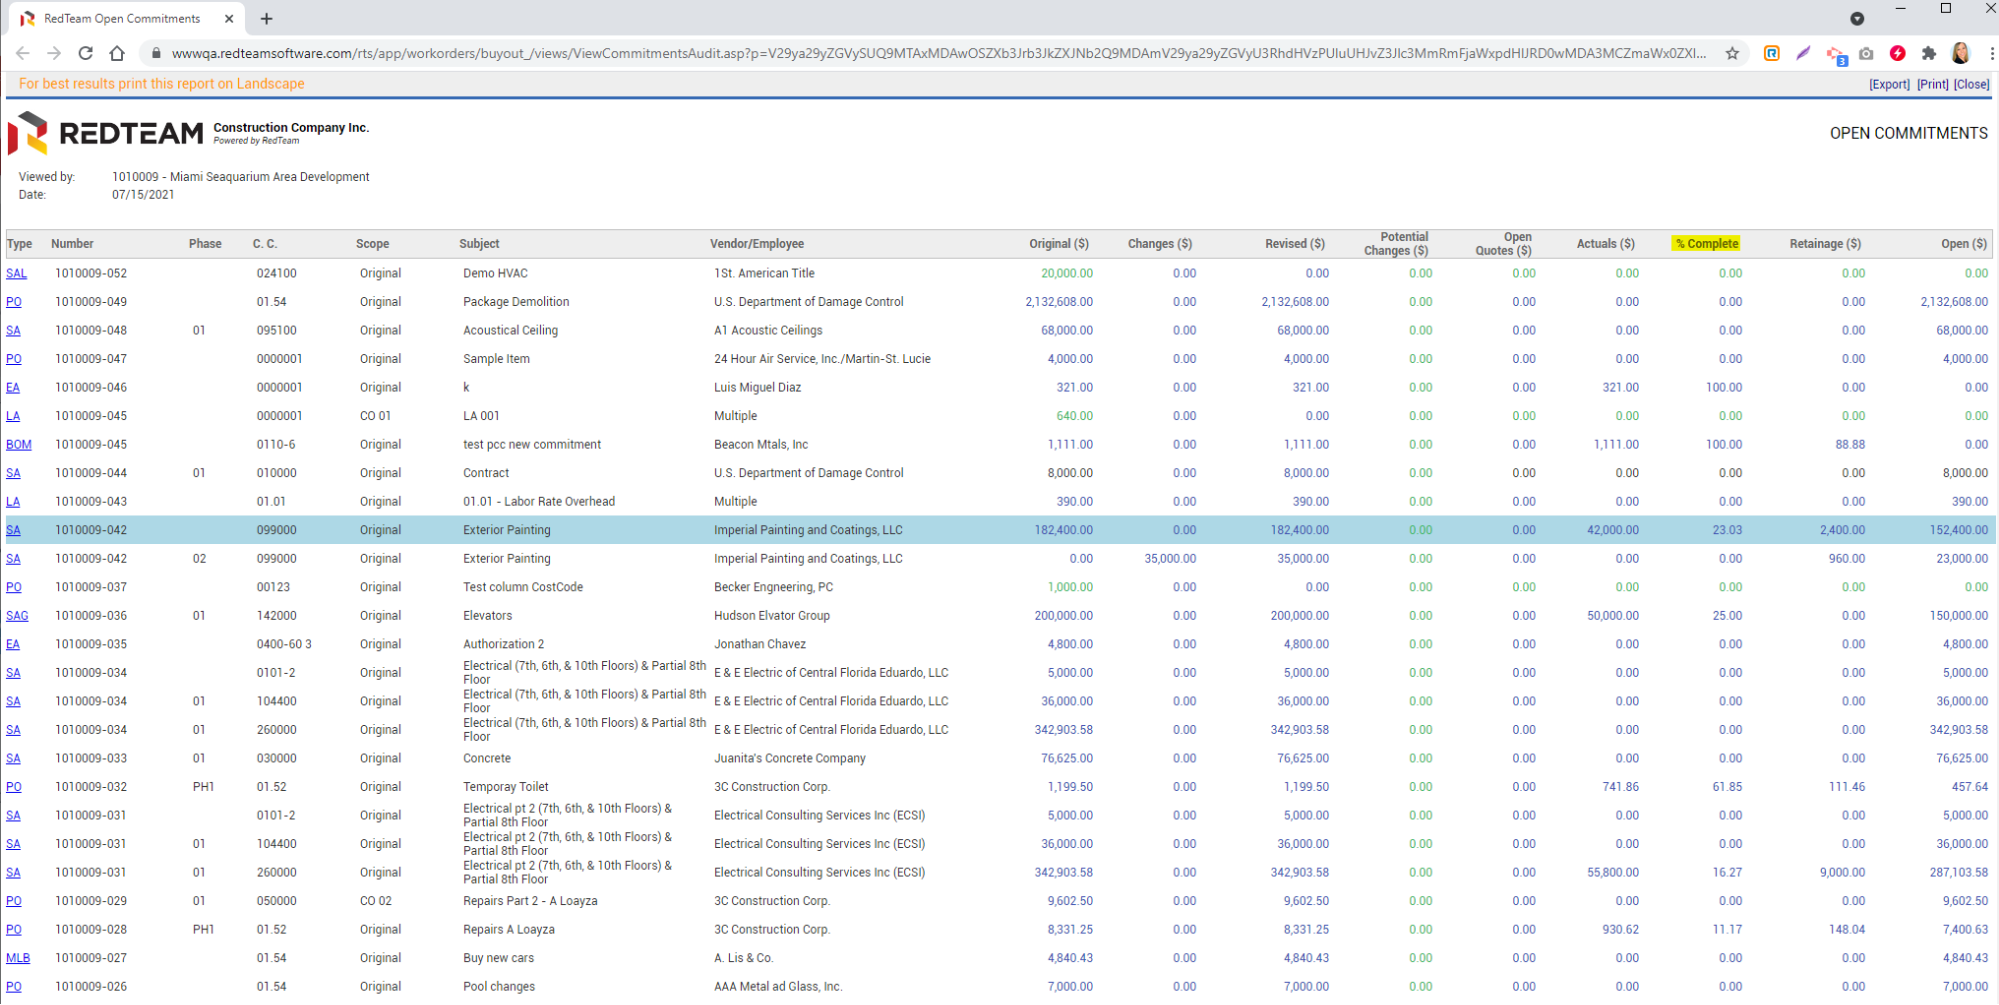
Open Commitments Report: Display Percentage of Completion
A new column has been added to the Open Commitments report, located in the Buyout and Budget tabs of a Project. The new column displays the overall percentage of completion per Commitment.
Who is impacted by this update?
Anyone who runs an Open Commitments report. Typically Project Managers, Accountants, and Admins.
Why would you use it?
If you would like to know the percentage of completion for a particular Commitment based on the total Commitment (original and change orders) vs Actuals (committed invoices), you can quickly get this information on the Open Commitments report.
How to use this feature
Nothing needs to be activated or turned on, simply run an Open Commitments report by going to a Project and clicking either the Buyout or Budget tab. The report is located under the View icon.
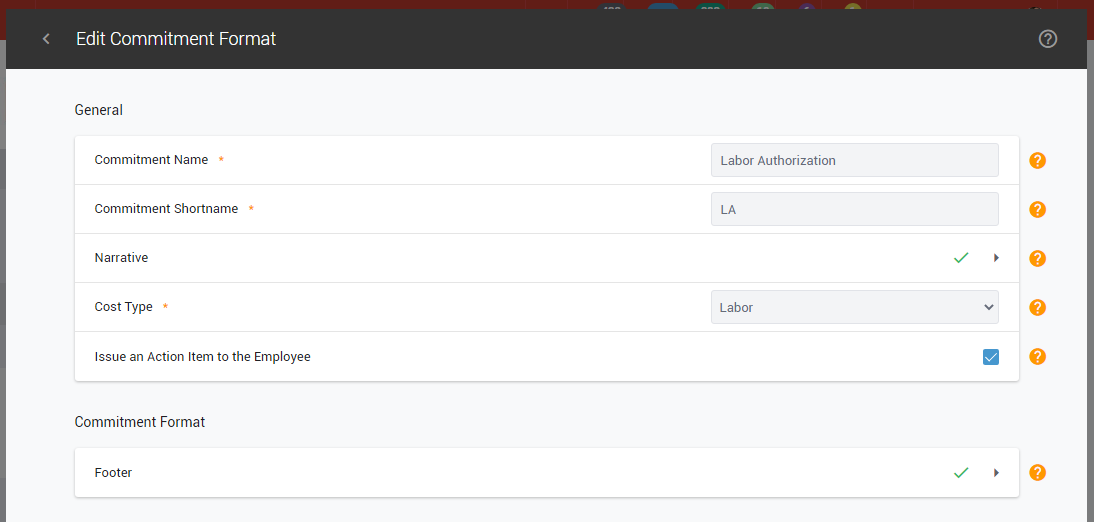
Configuration: Preference to Issue Action Items for Labor Authorizations
When a Labor Authorization (created in the Buyout tab) is Committed, you have the option to automatically issue an Action Item to the Employee who was authorized to work. If you would prefer not to send this Action Item automatically, you may turn this off in Configuration.
Who is impacted by this update?
Anyone who issues or receives Labor Authorizations. Typically Project Managers, Superintendents, and Admins.
Why would you use it?
If you would like Employees to be automatically notified via an Action Item that they have been assigned to work on a Project via a Labor Authorization, you may want to turn this preference on. If you would prefer to notify the Employee yourself some other way, or issue the Action Item later, you may want to turn this preference off.
How to use this feature
You must have Permission to access the Configuration menu to activate or deactivate this preference. Go to the Configuration menu > Commitment Forms > Edit the Labor Authorization > Issue an Action Item to the Employee.
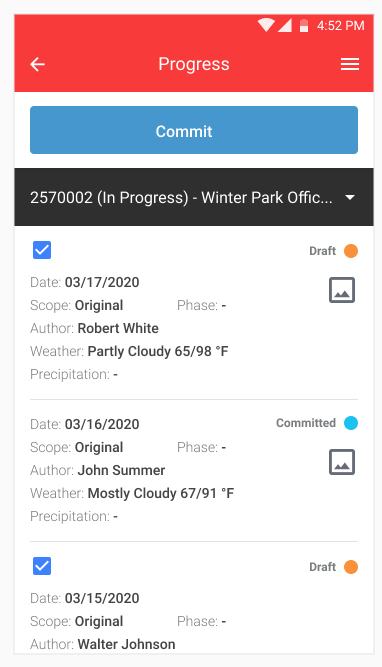
FieldShare: Commit Progress Reports
Users (with Permissions to do so) may now Commit Progress Reports directly from the FieldShare app.
Who is impacted by this update?
Anyone who approves Progress Reports by Committing them. Typically Project Managers, Superintendents, Operations Managers, and Admins.
Why would you use it?
Often the Commit option is used to indicate that a Progress Report has been reviewed and approved by a supervisor or Project Manager and previously this had to be done by logging in to RedTeam on a web browser. Now, users who do this approval via Commit may do so in the field or wherever they are using the FieldShare app.
How to use this feature
You must have Permission to Commit Progress Reports, and have the latest version of the FieldShare app downloaded on your mobile device. Log in to the FieldShare app and go to Projects > Progress. You may select one or many Progress Reports using the checkboxes. The Commit button will appear at the top once you have selected at least one Progress Report.
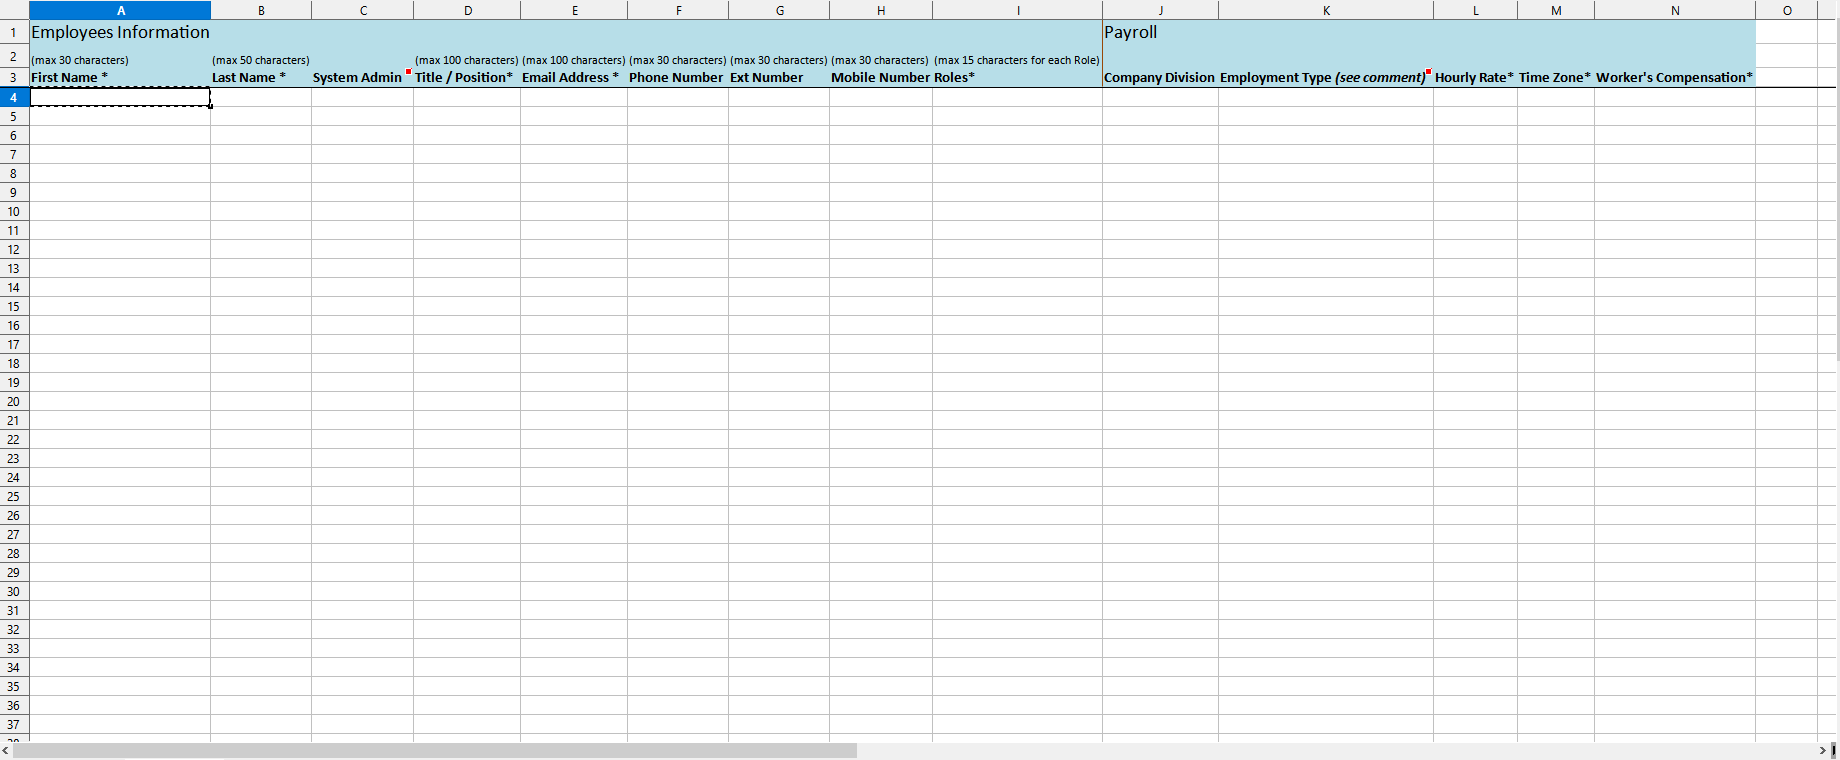
Employees menu: Import from a Spreadsheet To Be Released: July 31st
Much like you can already import Vendors, Customers, and Third-Parties into RedTeam via a spreadsheet, you now have the ability to import Employees. Rather than creating Employee profiles one-by-one, you can batch import.
Who is impacted by this update?
Anyone who sets up Employees in RedTeam. Typically Admins.
Why would you use it?
If you have more than one Employee to create at a time, you can use the spreadsheet to enter all the Employees’ information and create all the profiles at once, saving time.
How to use this feature
Go to the Employees menu, click the New (+) icon, and choose the option to Import from a Spreadsheet. From there you will be able to download the spreadsheet template, fill it in with all required fields, and load the data into RedTeam. Please note this feature will not be available until the end of the month.
Additional Updates
- Speed Optimization: Manage Vendor Invoices (3 Locations):
- Vendors Overview > Invoices tab
- Vendor Profile > Invoices tab
- Project > Manage Vendor Invoices
- Configuration > My Company: Employee Comments on Collaborative Consoles to be “Company Confidential” by Default
- Meeting Minutes: Allow Entering Non-Members as Participants (and Invitees on Meeting Agendas)
- API Connections:
- New DocuSign Information Page (in Apps Menu > DocuSign App Card > info icon)
- Minor fixes related to latest Chrome update